
Examples of Alan Chadwick's Garden Techniques
Section 2
Lavender
Oh, Muse, let me sing the praises of Lavender; what would a garden be without it? A dull, lifeless thing; everything for the stomach, nothing for the soul . . .
It's easy to overlook the uplifting effect the bees and butterflies bring to the garden, and lavender is one of the plants that exerts the strongest draw on those flying friends. And its fragrance? Who could possibly describe it? Utterly impossible! But it is enchanting beyond belief and gives an instant uplift to the spirits. Just bruise a little as you walk by the lavender bed and sniff it as you continue on your way. Instantly transported to heaven and as instantly returned, as the fragrance is elusive. After ten or fifteen seconds, the nostrils can no longer smell the balsam, they become inured and overcome by the ecstasy of it all. You have to let the senses rest a bit, before you can really enjoy another such experience.
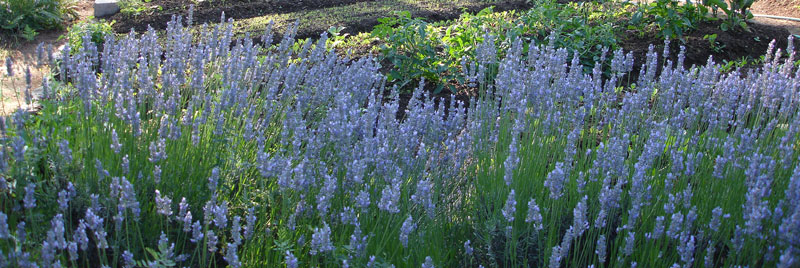
A bed of Lavender on the border of the garden
Nor is there a plant more generous than the lowly lavender. Yes, the first year it needs a little care, but only a watering now and again. Ever after you just ignore it; it thrives on the neglect; it just gives and gives and gives. Cut off the dead flowers as you like or not. Prune it down low or let it run. Water if you have the time, or just wait for the winter rains. Year after year it provides an abundance of fragrant flowers that last and last. Put them in a vase with water, or let them run dry; it's all the same. Gather them into a little bundle with a piece of raffia or yarn and stick them into a drawer with your linen or clothes. It will impart a delicious aroma to the clothing and keep the moths away. Want more of it? Easy. Just snip off little sprigs in the Spring and lay them at 45 degrees in a bit of sand. Keep it moist and they will root ad lib. A more generous plant doesn't exist. Lavender.
A profusion of lavender
Swiss Chard
Until working with Alan Chadwick in Santa Cruz, I had never heard of or tasted Swiss chard. It's a member of the beet family, and so you can think of beet green with a mild, tangy flavor if you want to form some idea of how it tastes. The beauty of chard is that it goes on and on bearing all season; you harvest it by breaking off one leaf at a time, giving the plant a chance to resuscitate between times. It is very easily grown, germinates we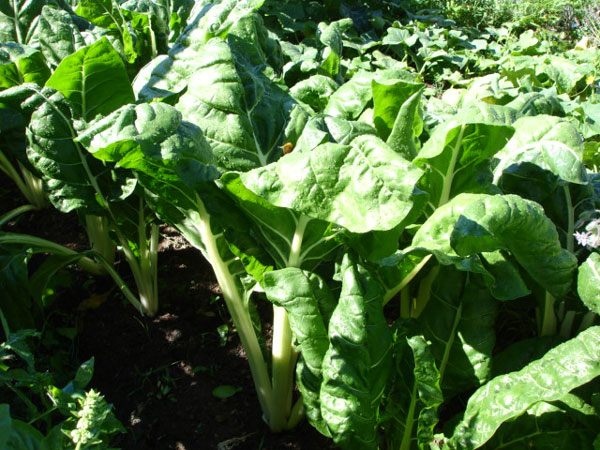 ll, and is quite delicious. But beware; you must sow it directly into the garden bed, as it has a goodly tap root that won't tolerate transplanting.
A bed of Swiss chard, grown in the manner of Alan Chadwick.
The culture of Swiss chard is like this: Prepare your bed in the usual way. First dig it thoroughly with a spade, loosening the subsoil with a garden fork if you like. Then go through the entire bed again with the fork, bringing up a nice tilth. Form up the bed with a rake, dress with well-rotted cow manure and bone meal, then work that in to a depth of about eight inches. Smooth once more with your rake, but don't rake any manure into the paths, as that wastes it. Now with the corner of a little hoe, make three little furrows about 1" deep down the length of the bed, first a central one, then one on each side, about 12" apart. The outside furrows should be some, say, 4" in from the shoulder of the bed. Then sow the seeds about 2" or 3" apart along each furrow. This is excessive, and will need to be thinned, but that way you avoid wasteful gaps in your planting in case the sparrows or slugs should make a meal of one or two. Finally cover with 1/4" of sifted soil that you removed from the bed into a wheelbarrow before making the furrows. Water well and be patient, as they take a while to germinate. Never let the bed dry out during this period or you'll lose the entire sowing.
After the plants reach 2" to 3" in height, begin to thin, just starting with those that are right on top of each other. Gradually thin as the plants grow up, until they stand about 12" apart in the rows. This gives you room to harvest them, on the one hand, but maintains the canopy of thermal control that protects the bed from the sun. To harvest, gently bend down the individual leaves you want to take until it breaks off at the base. Don't leave parts of the broken stalk attached, as this will cause the plant to rot. And don't take more than one leaf per plant at a time. Grow enough so that no plant is depleted by over harvesting.
To cook, be sure to use a stainless steel pot. Swiss Chard contains oxalic acid, and this will react with aluminum, drawing the aluminum from the pot into the food, which is toxic (the same is true with tomatoes or any acid food). Again: only stainless steel or enameled pots are permitted! Just steam the chard for ten minutes or so, and serve with a bit of olive oil and salt and pepper. I once heard Alan recommend cooking it in a little milk, as this supposedly neutralizes the acid, but have never tried it. You will probably end up with more chard than you need, if you're like me, but it also makes an excellent green for chickens and ducks. I have even used it to make sag paneer, along with a few other greens like mustard greens, spinach, and kale. It's perfect.
Cilantro
Some people have a natural aversion to cilantro: they just can't bear the smell. In an attempt to explain this, scientists have speculated that the smell is a bit similar to the smell of bed bugs, and this may have become genetically codified in some people. Too bad for them, as cilantro is one of the absolute joys of life. If you eat any kind of ethnic food, Indian, Thai, Mexican, for example, you simply must have cilantro. Raw or cooked, it just makes the dish, which without it, is bland as bland.
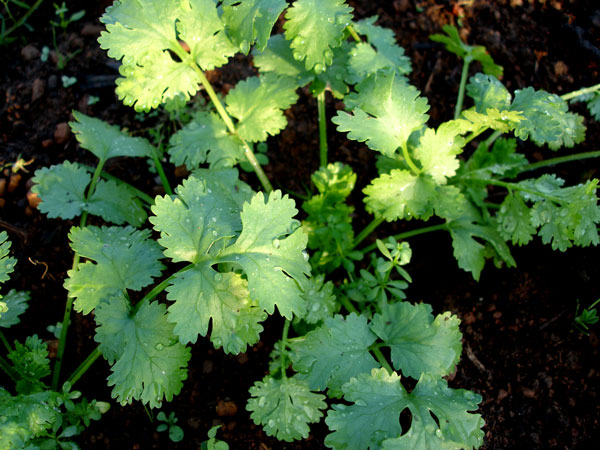
Cilantro, one of the most useful of culinary herbs
Although the culture of cilantro is not difficult, it is somewhat exacting. Sow it directly into the garden in little furrows about 4" apart in the bed. Cover gently, remembering the golden rule: under-cover not over-cover. Water and wait, as cilantro takes a long time to germinate. It has the very annoying habit of not all germinating at once. It begins after two weeks, but will go on germinating for a month, so don't let it dry out during this time. Most often two plants emerge from each seed, so remove the less vigorous one as soon as you are certain the other will surely survive. The best time to grow it is in the spring and fall, but you should sow a little of it every month during summer because it will bolt quickly with the heat. Keep it cultivated between the rows until it forms its canopy of thermal control. Harvest a few sprigs from each plant for as long as you can. Let a few good, vigorous plants make seed from the outset, and harvest those seeds for your next crop. It will repay you amply for your efforts, believe me.
The Strawberry
I had been working in the garden at Santa Cruz for a month or so when Alan announced at the morning meeting one day that the alpine strawberries were ready to harvest. He looked right at me and asked if I were interested in doing that job. Of course, I accepted, not really knowing what I was getting involved with. He gave me a little basket and showed me how to pick the strawberries. Up to that point, I had only tasted the insipid monstrosities sold in supermarkets, which taste more like radishes, and so was not prepared for what happened next. As I proceeded to harvest the alpine strawberries (the variety was Baron Salamanca, I recall) a few found their way into my mouth. The electricity shot through my system like lightning; never had I imagined in my wildest dreams that something that energetic could exist in the world.
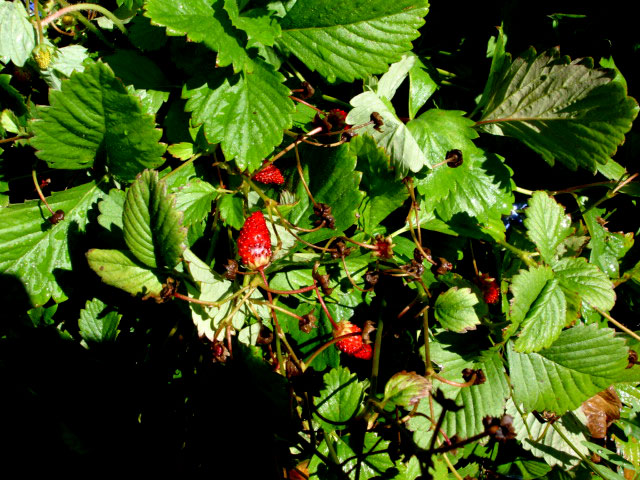
The Alpine Strawberry
One day someone arrived at the Garden Project to ask Alan if he would help to set up a school garden at a local Continuation High School. Alan politely explained that he had his hands full at the moment, then he asked us apprentices if anyone might be willing to help this teacher. Something possessed me to volunteer, and that was the beginning of a process that became my life's work.
I went out to visit shortly after that, and helped them figure out a design for the garden. They had no tools and no budget, so I asked Alan if the Garden Project could help out in any way with that problem. Without hesitating for a second, he took out his personal check book and gave me enough money to buy five or six spades, and an equal number of spading forks and rakes. I took these down to the school site and showed the students how to use them.
These were your discipline problems, kids with an attitude who had been kicked out of the regular high schools. To say they looked at me with skepticism is the understatement of the century. But I blithely kept talking, and then we all kind of went at it. Alan had recently bought five hundred strawberry plants for the farm project that was just getting started at that time, and he had given me forty or fifty of them to plant down at the new school garden. I really had no experience with strawberry culture, so asked him to show me how to plant them. This is what I learned:
Prepare your bed in the normal way, water, and let dry until it is in the condition that Alan called, "just moist." Not at all muddy, but not at all dry. Just moist. Then, with a hand trowel, dig a hole for your first plant. It should be about 6" to 8" in diameter and about 4" deep. Then draw up the soil from the bottom edges of the hole into a little mountain or pyramid in the center, say about 3" high. The peak of the pyramid should now be about 1" below the level of the surface of your bed.
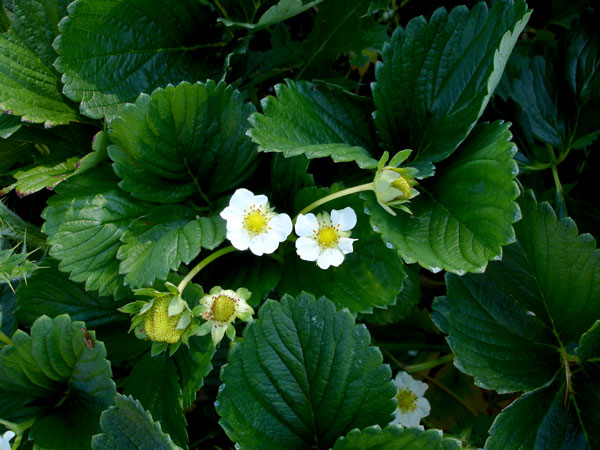
Strawberries in bloom
Next, spread the roots of a strawberry plant out evenly and place it over the little pyramid with the roots dangling down its sides, the hole should be able to accommodate them without causing any "bunching up" at the bottom. Then cover the roots with the soil that you removed in digging the hole, and firmly tamp down. If you did everything correctly, the plant should be very well anchored in the earth, with the crown at about soil level. The emerging leaves should all be above the surface of the ground, with the roots well below it. Water carefully with a tin can pinched to form a spout, and there you are. Proceed with the other plants, making staggered rows with plants about 10" or 12" apart.
"All soils for the strawberry should be firm. They love to have their roots in amongst little rocks, in amongst stones, and the soil to become firm. It is essential that the crown sits not in the soil, nor totally out of it. Very important position. Better, a little out of it, than set into it."
(Alan Chadwick, lecture of 23 August, 1978)
Never, ever, add wood ash or lime to a strawberry bed, as the plant is a lover of acidic soils. If the ph is not right, the growth will be stunted, and you will be treated to quite a depressing sight every time you look at your strawberries. If necessary, mulch with a bit of peat moss on the surface between your plants, and that will be like night and day in their growth. They will go from a condition of pathetic non-performance to one of vigorous, thriving, ecstasy. But don't overdo it with the peat moss or it will impair the flavor.
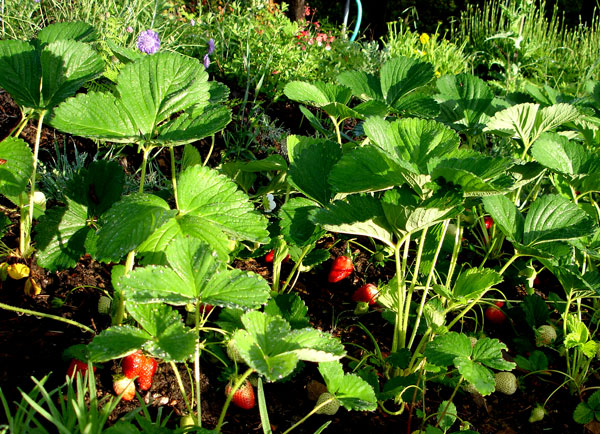
A bed of strawberries grown according to the Alan Chadwick method.
Propagation of strawberries is simple. Allow them to fruit the first year, as usual. Then, in the second year, designate some of your plants not for fruiting but for production of new plants. Do not allow these to make fruit, but remove the flowers as soon as they appear. The plants will begin to make runners, long stalks with little leaves at the end that will become your new supply of strawberry plants. Allow no more than three of these runners per plant; snip off the others that try to form. Many varieties will send out additional runners from the ends of the runners, but do not allow this. Snip them off mercilessly. Get in a supply of 4" or 5" clay pots (unglazed), fill them with potting soil, and bury them in the ground underneath where the runners intend to alight. Make some little wooden pegs with an open notch in one side, and peg the runners down gently inside the pots. They will root there, and at the end of the season you will have an excellent supply of new strawberries to plant out the next year in the spring.
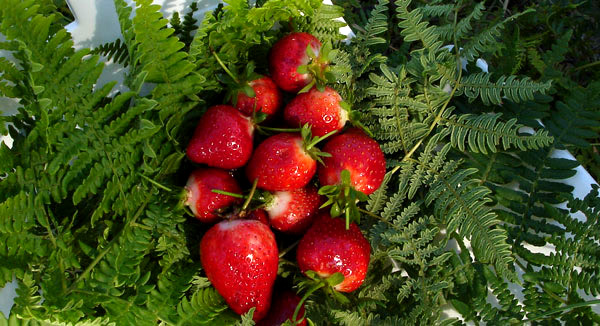
Strawberries harvested and laying in a bed of Pteris (Bracken Fern)
At the end of the school year, the high school teacher told me that, because of the garden, it had been his most rewarding year of teaching, ever. I myself observed the change in attitude that the garden brought about in these young people. They had become enthusiastic and motivated to work and learn. Perhaps more than anything else, they discovered the joy in caring for living things. That experience was, for me, the inspiration for my subsequent life-long work in education.
Click here to continue reading