
Examples of Alan Chadwick's Garden Techniques
Section 4
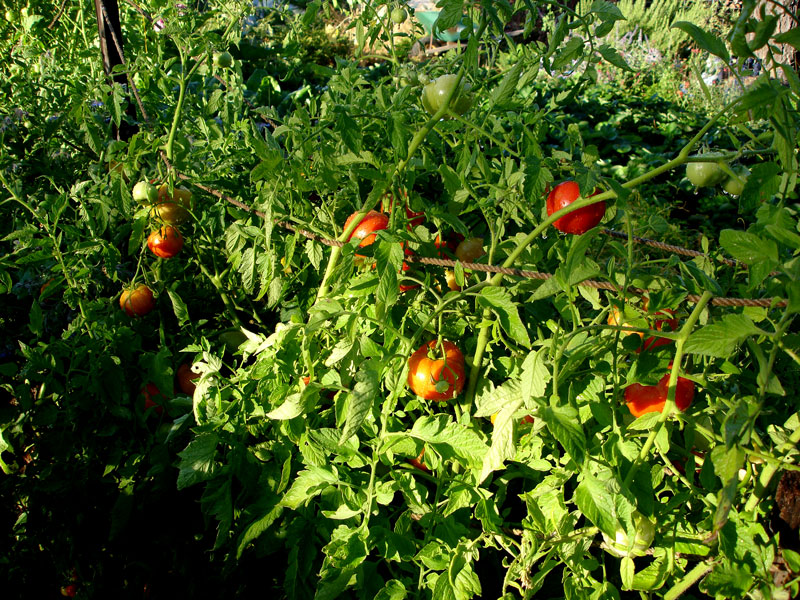
Tomatoes grown in the manner of Alan Chadwick, using the Biodynamic French Intensive method.
Tomatoes
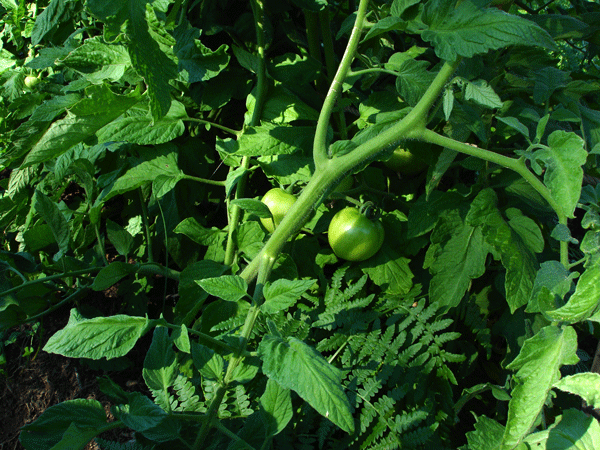
Alan Chadwick was a fanatic about tomatoes. He designated one part of the garden in Santa Cruz as the "Tomato Terraces," where year-after-year the tomato crop was grown. He told me one time that tomatoes are one of the few plants that like to grow on their own soil, that is, on soil that has born tomatoes in the previous year. He cautioned, however, that the soil must be remade anew before planting out the new batch each Spring. Perhaps more than any other plant, the tomato loves compost. Alan insisted that compost was to be used as it was decomposing, not after it had decomposed. He would apply generous portions of decomposing compost as a top-dressing to the beds several times during each growing season. And of all the elements of the compost, the most beneficial to the tomato are egg shells. The plant is mad about them and will forage deep down if it smells them in the depths below. This can be used to advantage as a stimulus for promoting good root development.
Propagation of the Tomato
Alan grew tomatoes in the absolutely classic manner, whereby one achieves the most successful outcome in fruit production, both in quality and quantity. The first problem that must be overcome at the outset is the selection of the varieties to grow. He always grew plants from each of the two great divisions of the tomato family: the standard and the cherry. When selecting the variety of standard tomato, the most important criteria are the local climatics. Do you live in an area of extremely hot summers that one finds, for example, in the inland valleys of California, and throughout the midwest? Or are you in the San Francisco Bay Area, where foggy summers are the bane of tomato enthusiasts? Consult your local nurseries, talk to other gardeners, and study the problem well, as a variety that is unfit for your area will not thrive; it will only bear the fruits of disappointment and heartache.
But when it comes to the selection of the cherry tomato, the choice is much easier. Alan Chadwick cultivated his own strain of cherry tomato, every year selecting the finest specimens for seed, and finally achieving a superb result. The seed came absolutely true to type, the flavor and texture were better than any other available, and it thrived in diverse climates. Fortunately, the strain was not lost when Alan died. It was rescued and cultivated by the folks at the Seeds of Change seed catalogue, and is sold under the name: the Chadwick Cherry Tomato.
Assuming that the last frost in your area is mid-April, sow the seed in February, ideally timing the germination with the day that falls two days before the new moon. This will yield the best results, but as Alan once told me, the important thing is to sow your plants, even if that means that you miss the ideal timing of the moon. Sometimes other factors interfere with your schedule and you just need to start your plants when possible. But the moon is a powerful influence on the waters of the earth, witness the ocean tides and the menstrual cycles of human females, both of which are in sync with the 28 day lunar cycle, so take advantage of it if you can. If your date of last frost is earlier or later, adjust the month of sowing accordingly.
Prepare your seed flat like this: Use the standard size wooden seed flat. Fill the bottom with about 3/8" to 1/2" of the large size oyster shell, the kind that is sold in feed stores for poultry. This exerts the same attraction for tomato roots as the egg shells discussed above. Next, make a stratification of about 1/4" thick of well rotted cow manure, topped by a dusting of bone meal. Then fill the flat up to within 1/4" of the top with standard "a third, a third, a third," as described in the discussion on lettuce. Sow the seed, not too thickly, and cover lightly with more sifted potting soil. Remember: under cover, not over cover. Water with a watering can that has a fine rose on it, so none of the seeds are washed away or uncovered. Set in a location that receives filtered sun, and keep moist. In most locations, the flat will have to be kept inside, at least during the nigh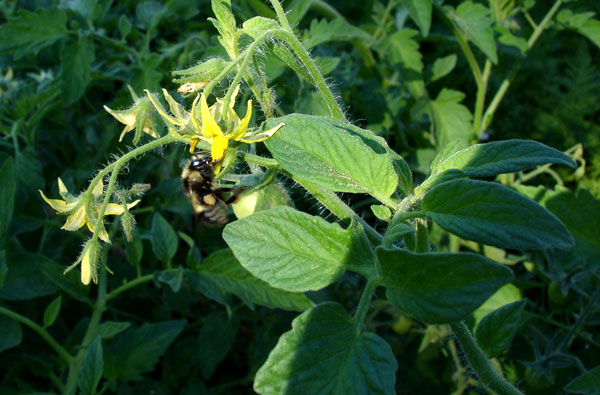 t, because of frost danger. Make sure the plants get as much direct sunlight as possible so that they do not become "leggy," or overextended as they reach up for the light.
When the tomatoes begin to crowd each other, it's time to transplant into another box, but now each one should be separated from the others by 2" or so. Fill the seed flats with the same stratifications as before, make sure the soil is "just moist," and plant your tomatoes as deeply as possible, holding them by one leaf whenever it becomes necessary to handle them. NEVER grab them by the stem, as this will do irreperable damage to your young plants. Water them well in, but do not allow water to touch their leaves for three days. Use a tin can bent to form a spout on one side, and water all the way around each plant.
Set these transplanted tomatoes outside in the sun for as much of each day as you safely can, then bring them in at night or whenever frost threatens. Grow them until they begin crowding once again, then transplant them into individual pots. Clay is the best, but peat moss "jiffy pots" will do. Never, never let these pots dry out. Then, when all danger of frost is past, plant your tomatoes out into the garden.
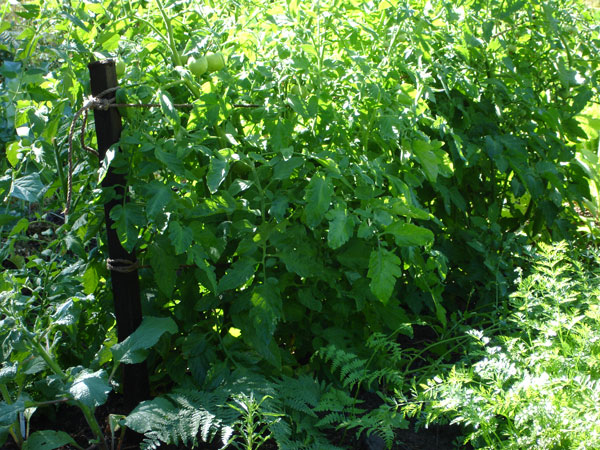
The beds will have been prepared well ahead of time. Dig a deep (16") trench on each side of a wire trellis that is strung down the middle of a bed. Alan used 2" mesh chicken wire, 5' or 6' high, mounted on wooden poles set about 6 or 8 feet apart. Loosen the soil at the bottom of the trench with a spading fork, and then lay down a strata of egg shells or oyster shells, maybe 1/2" thick. Then cover with 2" of soil. Next comes a strata of well-rotted cow manure about 2" thick, likewise with a cover of soil. Then a nice, generous dusting of bone meal between 1/8" and 1/4" thick, and another layer of soil. Follow with a strata of semi rotted compost, and another layer of soil. End with a surface dressing of the top 6" or 8" with a mixture of bone meal and cow manure well tilthed-in.
 Plant the tomato plants as deeply as you can, but without covering the leaves. They will make new roots from the stem whenever it is covered by soil, and the more roots, the better the crop. A trowel will not be adequate for this planting step; use a garden spade and disturb the roots as little as possible. Water deeply and never let the bed dry out too much. Just moist. As the plants grow, tie them to the chicken wire (or baling wire, rope, or whatever your trellis is made of) with a soft twine tied not too tight. The plants will go up a good 5' or 6' and bear you a bountiful harvest.
Do not refrigerate tomatoes, as this will impair the flavor. Just keep them in a cool, dark place until you're ready to devoir them.
Making Compost in the Alan Chadwick manner.
"Life into death into life," as Alan always used to say, and the vehicle for that transformation is the compost pile. Every weed pulled up out of the garden beds, every ounce of kitchen scraps, any bolted turnips or radishes that are cleared out for a new crop . . . it all goes onto the compost as soon as possible. Plants that have dried out have infinitely less value compared to anything green, so collect all your weeds, thinnings, clearings, flowers that have passed their prime, and everything else into a bucket as you work; never toss them onto the ground, telling yourself you'll get to it later, because you won't. Gather it up immediately and then carry it over to the compost before you take a break or go on to something else. When fresh, it will all be converted to the best fertilizer possible. Alan often called compost, "the gold of the garden."
There are, however, a few exceptions: Don't add noxious weeds like convulvulus (morning glory), bramuda grass, poison oak, plants with hard thorns like roses, the leaves of poplars, eucalyptus, pines, or other conifers. And please, no dry or thick sticks (they must go onto the burn pile). Keep manures separate, as there will be times when you want the one and not the other. No paper or straw, just fleshy green matter that will ferment and rot into delicious friable garden soil.
Here's how you build it up: First, loosen up the ground with a spading fork, clearing and cultivating a level area of, say, 8' by 8'. Then put down a good, thick layer of roughage, maybe 12" thick for a base that is well drained. Then another 12" of weeds, greens, thinnings, whatever you have that is green and suculent. Then add a layer of kitchen scraps, maybe 2" to 4" thick. Then cover the entire pile with two or three inches of good loam soil. Then repeat the 12" of greens, the 3" of kitchen scraps, and the 2" of soil. Continue alternating these layers until the pile becomes too high to comfortably use, say, 4' high. Cap with an extra heavy layer of soil, about 6" thick, and then start a new pile.
The compost will begin to heat up very quickly, but a little sour milk thrown in whenever possible will speed up the fermentation. Keep it moist so that the bacterial action is uninterupted the entire time it is working. If holes appear in the outer covering of soil, fill them in so that all those precious gasses are trapped inside, not lost to the atmosphere. Then begin to use it before it is all digested and decomposed. Worms will appear as if my magic: be gentle with them. Keep a sharp eye out for moles, as they will eat their weight in worms every day. They are difficult to deal with, as they don't easily enter traps. You have to hunt them in the early morning, watching for their rising burrows just under the surface, and pounce on them with a fork. Get it under them and fling them, soil and all, to the top of the ground, where you can gather them up into a bucket. It's a tricky business, but must be done or your work will all be in vain. Gophers are easier to catch, are vegetarians, but can do a huge amount of damage very quickly. Don't put if off.
A jack rabbit visits the garden in the early morning.
Return to the top of this page